ListView控件 这个控件就是一个列表框控件,比较的常见,基本每个软件都有的。
控件性质 其实这个和之前的那个下拉框和文本提示框基本上性质一样,都是控件-适配器-数据,这三个东西构成的。
简单适配器 其实这里说的简单,是指的适配器比较简单,用安卓给我们提供的适配器:android.R.layout.simple_list_item_1。
1 2 3 4 5 6 7 8 9 10 11 12 13 14 15 16 17 18 <RelativeLayout xmlns:android ="http://schemas.android.com/apk/res/android" xmlns:tools ="http://schemas.android.com/tools" android:layout_width ="match_parent" android:layout_height ="match_parent" android:paddingBottom ="@dimen/activity_vertical_margin" android:paddingLeft ="@dimen/activity_horizontal_margin" android:paddingRight ="@dimen/activity_horizontal_margin" android:paddingTop ="@dimen/activity_vertical_margin" tools:context ="com.example.android_study9.MainActivity" > <ListView android:id ="@+id/Lv" android:layout_width ="match_parent" android:layout_height ="match_parent" > </ListView > </RelativeLayout >
布局的话呢就是一个列表框。
1
2
3
4
5
6
7
8
9
10
11
final ArrayAdapter<String> adapter = new ArrayAdapter<String>(this , android.R.layout.simple_list_item_1,getData());Lv.setAdapter(adapter); private String[] getData(){ return new String[]{"a" ,"b" ,"c" ,"d" }; }
自定义适配器 这个是我们比较关注的,因为功能强大而且漂亮。
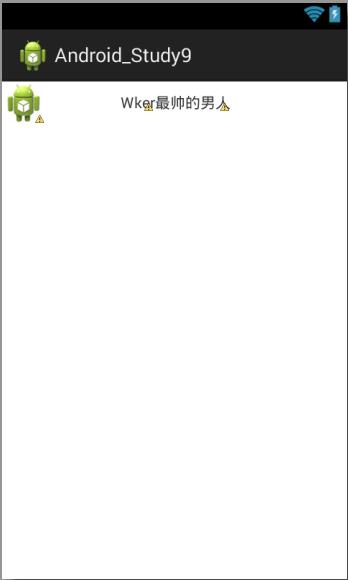
首先我们需要一个布局:
1
2
3
4
5
6
7
8
9
10
11
12
13
14
15
16
17
18
19
20
21
22
23
24
25
26
27
28
29
30
<?xml version="1.0" encoding="utf-8"?> <RelativeLayout xmlns:android ="http://schemas.android.com/apk/res/android" android:layout_width ="wrap_content" android:layout_height ="wrap_content" > <ImageView android:id ="@+id/iv_ava" android:layout_width ="40dip" android:layout_height ="40dip" android:src ="@drawable/ic_launcher" /> <TextView android:id ="@+id/tx_name" android:layout_width ="wrap_content" android:layout_height ="wrap_content" android:text ="Wker" android:layout_toRightOf ="@+id/iv_ava" android:layout_centerVertical ="true" android:layout_marginLeft ="70dip" /> <TextView android:id ="@+id/tx_des" android:layout_width ="wrap_content" android:layout_height ="wrap_content" android:text ="最帅的男人" android:layout_centerVertical ="true" android:layout_toRightOf ="@+id/tx_name" /> </RelativeLayout >
这个时候我们需要给他们ID,因为我们需要在后面用到。
然后因为我们是自定义的适配器,所以我们需要自己设置一个继承于适配器的一个类。
1
2
3
4
5
6
7
8
9
10
11
12
13
14
15
16
17
18
19
20
21
22
23
24
25
26
27
28
29
30
31
32
33
34
35
36
37
38
39
40
41
42
43
44
45
46
47
48
49
50
51
52
53
54
55
56
57
58
59
60
61
62
63
64
65
66
67
68
69
70
71
package com.example.android_study9.adapter;import java.util.List;import com.example.android_study9.R;import com.example.android_study9.model.finendmodel;import android.content.Context;import android.view.View;import android.view.ViewGroup;import android.widget.BaseAdapter;import android.widget.ImageView;import android.widget.TextView;public class FriendsAdapter extends BaseAdapter public List<finendmodel> mData; private Context ctx; public FriendsAdapter (Context ctx,List<finendmodel> mData) this .ctx = ctx; this .mData = mData; } @Override public int getCount () return mData.size(); } @Override public Object getItem (int arg0) return mData.get(arg0); } @Override public long getItemId (int arg0) return arg0; } @Override public View getView (int arg0, View arg1, ViewGroup arg2) View v = arg1; holder h = null ; if (v == null ) { v = View.inflate(ctx, R.layout.picture, null ); h = new holder(); h.iv_ava = (ImageView) v.findViewById(R.id.iv_ava); h.tx_name = (TextView) v.findViewById(R.id.tx_name); h.tx_des = (TextView) v.findViewById(R.id.tx_des); v.setTag(h); }else { h = (holder) v.getTag(); } finendmodel f = mData.get(arg0); h.iv_ava.setImageResource(f.getImgId()); h.tx_name.setText(f.getName()); h.tx_des.setText(f.getDes()); return v; } private static class holder { private ImageView iv_ava; private TextView tx_name; private TextView tx_des; } }
说难的话呢也不是很难,但也不算是简单,首先构造方法中需要传递一个设备上下文,需要一个List的泛型数据,这个泛型的类是:
1
2
3
4
5
6
7
8
9
10
11
12
13
14
15
16
17
18
19
20
21
22
23
24
25
package com.example.android_study9.model;public class finendmodel private int imgId; private String name; private String des; public int getImgId () return imgId; } public void setImgId (int imgId) this .imgId = imgId; } public String getName () return name; } public void setName (String name) this .name = name; } public String getDes () return des; } public void setDes (String des) this .des = des; } }
主要是用来存储我们的图片ID,名称和说明的。View.inflate(ctx, R.layout.picture, null);来获取,第二个参数,是我们自定义的一个布局。View arg1,如果这个不为null,就是当前项目的一个缓存,这个时候我们只需要判断是不是为null,不是的话呢就用之前的这个项目,那么我们的内存就会比较的快了,为什么可以这样,因为我们缓存的也就是当我们往下滑动,看不到的那部分丢弃的,这个时候,再通过这个内部类,我们就可以实现一个减少内存的一个效果了,然后我们设置空间属性,最后将我们的View返回回去。
1
2
3
mAdapter = new FriendsAdapter(this , getData1()); Lv = (ListView) findViewById(R.id.Lv); Lv.setAdapter(mAdapter);
getData就是用来返回数据的。
1
2
3
4
5
6
7
8
9
10
11
12
private List<finendmodel> getData1 () List<finendmodel> list = new ArrayList<finendmodel>(); for (int i = 0 ; i < 20 ; i++) { finendmodel f = new finendmodel(); f.setDes("Wker" +i); f.setName("Wker" +i+i); f.setImgId(R.drawable.ic_launcher); list.add(f); } return list; }
其实也就是返回回去一个finendmodel泛型的List集合,然后我们可以增加两个点击事件:
1 2 3 4 5 6 7 8 9 10 11 12 13 14 15 16 Lv.setOnItemClickListener(new OnItemClickListener() { @Override public void onItemClick (AdapterView<?> arg0, View arg1, int arg2, long arg3) String txt = ((finendmodel)mAdapter.getItem(arg2)).getName(); Toast.makeText(MainActivity.this , txt, Toast.LENGTH_SHORT).show();; } }); Lv.setOnItemLongClickListener(new OnItemLongClickListener() { @Override public boolean onItemLongClick (AdapterView<?> arg0, View arg1, int arg2, long arg3) String txt = ((finendmodel)mAdapter.getItem(arg2)).getDes(); Toast.makeText(MainActivity.this , txt, Toast.LENGTH_SHORT).show(); return true ; } });
看名字就知道了,第一个是单击,第二个是长按,需要注意的是长按的返回值决定了是否允许点击事件。mAdapter.getItem(arg2)这个getItem方法使我们自己重写的,返回的也就是项目,以为我们知道这个返回来的就是一个finendmodel,我们可以强转,然后再从里面获取数据就好了。